
![]() Google Analytics is one of the most popular website analytics tools 100% free for anyone to sign up for and use. Sometimes, we give Google too much information about our website and there may be sections of the site that you do not want the analytics script to log. We have made adding Google Analytics to your website super simple with this easy to import script. Simply follow the steps and you will be able to install the Google Analytics tracking script in no time. Also, you will have the utmost control with selecting the sections of your website that you allow the script to track.
Google Analytics is one of the most popular website analytics tools 100% free for anyone to sign up for and use. Sometimes, we give Google too much information about our website and there may be sections of the site that you do not want the analytics script to log. We have made adding Google Analytics to your website super simple with this easy to import script. Simply follow the steps and you will be able to install the Google Analytics tracking script in no time. Also, you will have the utmost control with selecting the sections of your website that you allow the script to track.
You can follow the steps below to obtain your Google Analytics Tracking ID, which you will need to copy and paste into two seperate locations within the script. These locations has been marked ADD_YOUR_TRACKING_ID_HERE for your convenience.
The image below, shows you where you can find your Tracking ID within Google Analytics.
![]()
Free Download
Steps
- Click and download the google-analytics-tracking-script.zip file above
- If your browser or operating system automatically unzips the file, please compress it back into a .zip file
- Go to the Import / Export feature of CSS & JavaScript Toolbox PLUS. If you do not own CJT PLUS, then grab your copy here: CSS & JavaScript Toolbox PLUS
- Click the Import tab
- Upload the google-analytics-tracking-script.zip file
- For the code block called Google Analytics Tracking Script
- Select the Assignment checkboxes (e.g. Page, Post, etc) that you want Google Analytics to track.
Quick Tip: Click the Aux (auxiliary) tab in the Assignment Panel. Here you will find common sections such as Entire Website, All Pages, All Posts, All Categories, All Archives, etc. It is a good idea to untick Website Backend
- Click Save
Additional Notes
- You will need to sign up to Google Analytics before you can receive a Google Analytics tracking code
- If you have signed up and are wondering where to get your Google Analytics tracking code, then follow the steps below:
- First log into Google Analytics
- Click Admin (Cog icon) in the left-hand column (near the bottom)
- Under the Property section and click .js Tracking Info
- Click Tracking Code
- Copy your Tracking ID to your clip board
- Go back to your code block with the Google Analytics Tracking Script
- Paste the Tracking ID exactly where it says:
ADD_YOUR_TRACKING_ID_HERE
Note: There are two locations that you need to paste this into
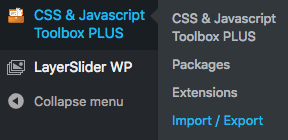 The CSS & JavaScript Toolbox Free version on WordPress.org does not have the Import/Export feature, so you would need to create the code blocks and add those scripts in manually.If you have purchased CSS & JavaScript Toolbox PLUS, you will find the Import / Export feature by hovering over the CSS & JavaScript Toolbox PLUS dashboard link on the WordPress dashboard main menu.
